

In This Lesson You Will Learn How To Create A New WordPress Page
In this lesson, we will cover off the basics of creating a page on a Wordpress website + application of key elements during the creation of a new page.
Why?
Creating a new draft page in the backend of a WordPress site allows:
- Website administrators to work on content without affecting the live version of the website
- It provides a safe and private space to experiment, refine, and review changes before publishing them
- Draft pages enable collaboration among multiple users, allowing them to contribute and provide feedback before the content goes live
- This process ensures that the website maintains a professional appearance and delivers accurate and polished information to its visitors
How To Create A New Page On WordPress - Part One
How To Create A New Page On WordPress - Part Two
Step By Step Instructions
- Log into the backend of your WordPress website
- Once logged in, you will be directed to the main dashboard of your WordPress website.
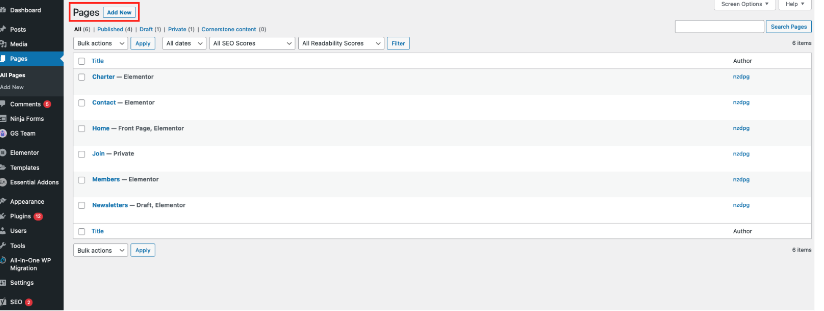
- In the left-hand side menu, hover your mouse over the "Pages" option and click on "Add New."
- A new window will open where you can start creating your new page.
- Start by giving your page a name. For example, you can call it "Newsletters."
6. On the right-hand side, under the "Visibility" option, choose who you want to see the page. You can select "Public" to make it visible to all audiences on your live website, "Private" to restrict access to site administrators and editors only, or "Password Protected" to require a password for access.
7. Leave the template as the default option.
8. Pay attention to the URL of your page. By default, the page URL will be based on the name you provided, following your website's domain. For example, it could be something like "yourwebsite.com/newsletters."
9. Once you've sorted out all the options, click on "Save Draft" to save your page as a draft copy.
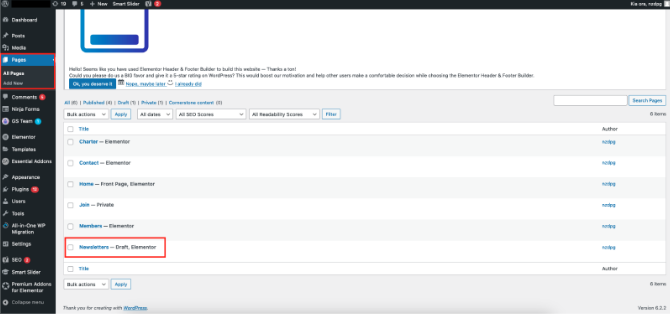
10. To confirm that your draft copy has been saved, click on the logo in the top left-hand side of the screen that says "View Pages." You should see your newly created draft page added to the list of existing pages, labeled as "Draft."
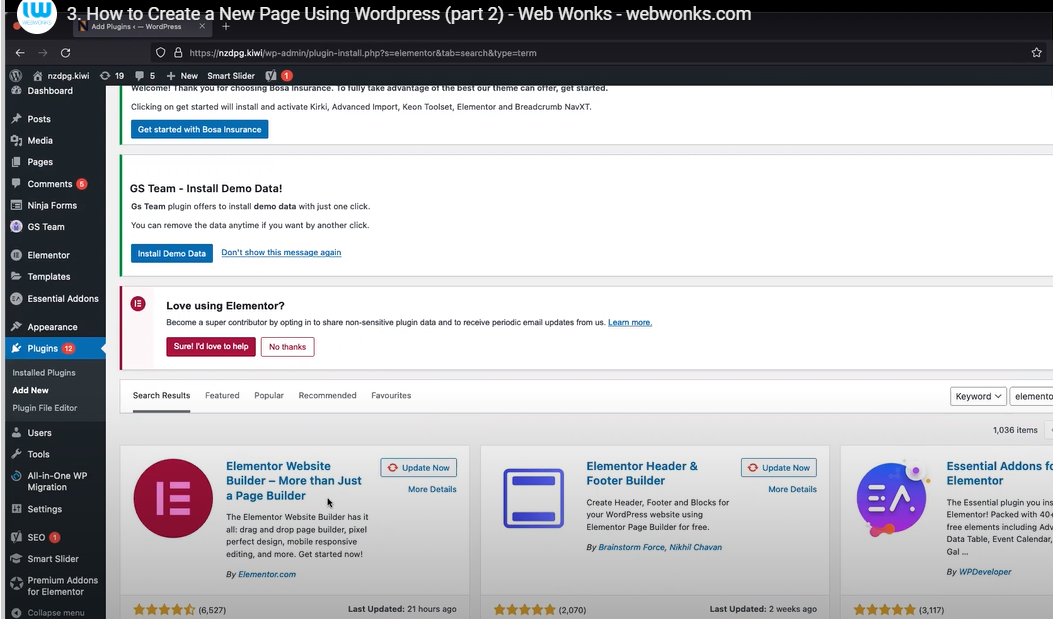
11. Install and activate the Elementor plugin if it's not already installed on your WordPress website.
12. Log into the backend of your website and navigate to the "Pages" option to find the draft page you want to add content to.
13. Click on "Edit with Elementor" to access the backend of the Elementor plugin.
14. Use the available widgets on the left-hand side to add content such as images and text to your page.
15. Preview the changes to see how your page looks before publishing. You can also check how the page appears on different devices.
16. If you want to review or restore previous versions, use the history feature located next to the responsive mode button.
17. Once you're satisfied with the content, click on "Publish" to make your page live on the website.
It's recommended to have intermediate knowledge of WordPress before making changes in the backend, as there may be complexities that beginners might find challenging.
Web Wonks does have a service level agreement which we can use to help you out with all your WordPress website needs so please get in touch with us and we'll be more than happy to assist you

Creating a new draft page in the backend of a WordPress site is a straightforward process that empowers website owners and administrators to curate fresh content. By accessing the WordPress dashboard, users can navigate to the "Pages" section and click on "Add New" to begin crafting their new page. With an intuitive editor and an array of formatting options, they can easily add text, images, videos, and other media to the page. The draft page can be saved periodically, allowing for revisions and refinements before publishing. This seamless backend functionality ensures a smooth content creation experience, enabling WordPress users to shape their websites with ease and efficiency.
To create a new draft page, log into the backend of your WordPress website, go to the main dashboard, navigate to "Pages" in the left-hand menu, and click on "Add New." From there, you can name the page, choose its visibility settings, and save it as a draft.
When creating a new page on WordPress, you have the option to set its visibility. You can choose to make it public, accessible to all audiences on your live website, or make it private, restricting access to site administrators and editors only. Alternatively, you can make it password-protected, requiring a password for access.
After saving your new page as a draft, you can confirm its status by clicking on "View Pages" and checking the list of existing pages. Your newly created draft page should be visible in that list, labeled as "Draft." This confirms that your page has been successfully saved and is ready for further editing or publishing.